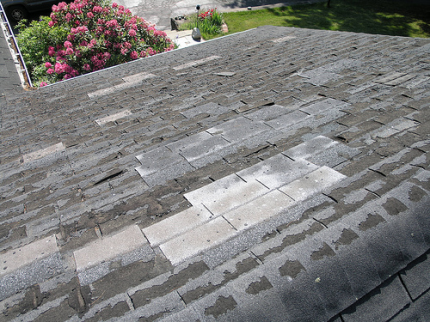
The purpose of a roof is to protect and weather-proof the structure and interior of your home. No matter how well you maintain your roof or how sturdy it is, it is very likely at some point you will get a leak. It can seem like a disaster, but most holes can be easily repaired without the need and expense for a complete roof replacement.
Before you can fix a hole in the roof, you must first understand the structure of a roof:
A roof is a system of slates or tiles that are applied in overlapping layers. Under the tiles or slates is usually a roofing felt or membrane that helps to prevent water from seeping through. Although roofs are built to withstand the elements, very severe weather can weaken, loosen, and damage the roofing tiles. When it does, you may get a hole in your roof.
Here’s a simple guide on how to fix a hole in your roof:
Tools You Will Need
- Roofing Cement
- Putty Knife
- Ladder
- Caulk Gun
- Roofing Nails
- Trowel
- Urethane caulk
- Aluminium sheet metal
- Flatbar
Getting Started
Inspect the roof to determine the areas of damage. Common problems that would contribute to leaks include cracks in the roofing material or valley gutters around chimneys, lead flashings, and around plumbing or furnace vents, as well as loose tiles.
It may not always be clear where the problem is coming from. If you cannot locate the leak, it might be time to seek advice from a professional. Your local roofing supply company should be able to provide you with a list of reputable contractors in your area. Otherwise, clean the whole roof and then apply a special roof coating, as this will help to protect the roof from further damage.
Once you have located the leak, remove any debris or loose mortar from the flashing with a wire brush before applying a thick layer of roofing cement with a trowel on the damaged area. Carefully remove the damaged tiles using a putty knife to separate the overlapping tiles and removing the nails with a flat bar.
Next, insert the new tile underneath the overlapping one and secure in place with a nail. Glue down the overlapping tile with roofing cement.
Cover the hole in the roof by using a piece of sheet metal larger than the size of the hole. Ensure water tightness by tucking the metal sheet under the tiles upslope of the hole by about an inch to ensure no water can travel back up around the joint. Then secure the metal piece with a urethane caulking material or roofing adhesive.
Remember that this method should only be regarded as a temporary repair and any damaged tiles should be replaced as soon as possible. Contact a professional for help.
This article was written by Ben Frisby on behalf of Ashbrook Roofing, retailers of roofing supplies such as lead flashing. See their lead flashing and other roofing supplies by clicking here.
Photo Courtesy of DolfinDans


